
Page 11 - DT 13-3.qxd
P. 11
10-14-Mainetti article -Q8_6-7-8-Ivoclar.qxd 10/21/2023 3:34 PM Page 2
DENTAL TECHNOLOGY, JULY-SEPTEMBER 2023
cosmetic section 11
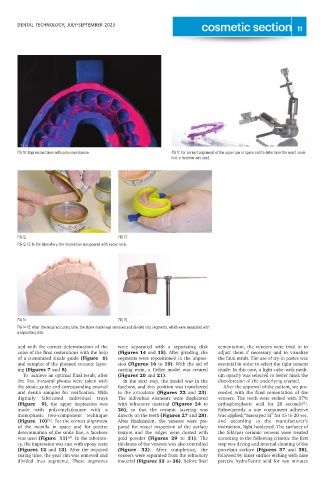
FIG 10: Impression taken with polyvinylsiloxane. FIG 11: For correct alignment of the upper jaw in space and to determine the exact smile
line, a facebow was used.
FIG 12 FIG 13
FIG 12-13: In the laboratory, the impression was poured with epoxy resin.
FIG 14 FIG 15
FIG 14-15: After the required curing time, the stone model was removed and divided into segments, which were separated with
a separating disk.
ued with the correct determination of the were separated with a separating disk cementation, the veneers were tried in to
color of the final restorations with the help (Figures 14 and 15). After grinding, the adjust them if necessary and to visualize
of a customized shade guide (Figure 6) segments were repositioned in the impres- the final result. The use of try-in pastes was
and samples of the planned ceramic layer- sion (Figures 16 to 19). With the aid of essential in order to select the right cement
ing (Figures 7 and 8). casting resin, a Geller model was created shade. In this case, a light color with medi-
To achieve an optimal final result, after (Figures 20 and 21). um opacity was selected to better mask the
the first intraoral photos were taken with In the next step, the model was in the discoloration of the underlying enamel.
the shade guide and corresponding enamel facebow, and this position was transferred After the approval of the patient, we pro-
and dentin samples for verification. With to the articulator (Figures 22 and 23). ceeded with the final cementation of the
digitally fabricated individual trays The individual elements were duplicated veneers. The teeth were etched with 37%
[5]
(Figure 9), the upper impression was with refractory material (Figures 24 to orthophosphoric acid for 20 seconds .
made with polyvinylsiloxane with a 26), so that the ceramic layering was Subsequently a one component adhesive
monophasic two-component technique directly on the teeth (Figures 27 and 28). was applied,“massaged in” for 15 to 20 sec.
[3]
(Figure 10) . For the correct alignment After finalization, the veneers were pre- and according to the manufacturer’s
of the maxilla in space and for precise pared for visual inspection of the surface instruction, light-hardened. The surfaces of
determination of the smile line, a facebow texture and the ridges were dusted with the feldspar ceramic veneers were treated
[4]
was used (Figure 11) . In the laborato- gold powder (Figures 29 to 31). The according to the following criteria: the first
ry, the impression was cast with epoxy resin thickness of the veneers was also controlled step was drying and internal cleaning of the
(Figures 12 and 13). After the required (Figure 32). After completion, the porcelain surface (Figures 37 and 38),
curing time, the gear rim was removed and veneers were separated from the refractory followed by inner surface etching with nine
divided into segments. These segments material (Figures 33 to 36). Before final percent hydrofluoric acid for two minutes