
Page 22 - DP.qxd
P. 22
prosthetic section
Anterior Mounting and Functional
Aesthetics – Completely
individualized
Markus Stang
Even in the field of complete prostheses, patients are becoming increasingly demanding and
want customized solutions. To ensure that treatment remains affordable, the author builds
on a superior quality line of pre-packaged teeth, whose position and surface morphology is
made more natural and individual with simple tricks.
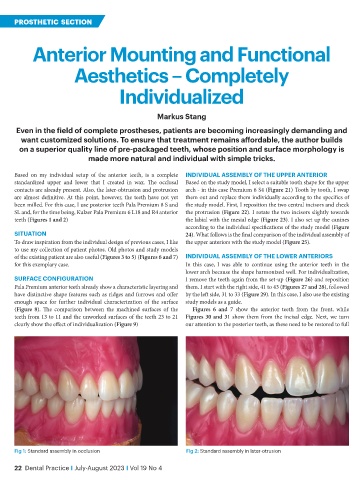
Based on my individual setup of the anterior teeth, is a complete individuAl ASSEMbly oF ThE uppEr AnTErior
standardized upper and lower that I created in wax. The occlusal Based on the study model, I select a suitable tooth shape for the upper
contacts are already present. Also, the later-obtrusion and protrusion arch - in this case Premium 6 S4 (Figure 21) Tooth by tooth, I swap
are almost definitive. At this point, however, the teeth have not yet them out and replace them individually according to the specifics of
been milled. For this case, I use posterior teeth Pala Premium 8 S and the study model. First, I reposition the two central incisors and check
SL and, for the time being, Kulzer Pala Premium 6 L18 and R4 anterior the protrusion (Figure 22). I rotate the two incisors slightly towards
teeth (Figures 1 and 2) the labial with the mesial edge (Figure 23). I also set up the canines
according to the individual specifications of the study model (Figure
SiTuATion 24). What follows is the final comparison of the individual assembly of
To draw inspiration from the individual design of previous cases, I like the upper anteriors with the study model (Figure 25).
to use my collection of patient photos. Old photos and study models
of the existing patient are also useful (Figures 3 to 5) (Figures 6 and 7) individuAl ASSEMbly oF ThE lowEr AnTEriorS
for this exemplary case. In this case, I was able to continue using the anterior teeth in the
lower arch because the shape harmonized well. For individualization,
SurFACE ConFigurATion I remove the teeth again from the set-up (Figure 26) and reposition
Pala Premium anterior teeth already show a characteristic layering and them. I start with the right side, 41 to 43 (Figures 27 and 28), followed
have distinctive shape features such as ridges and furrows and offer by the left side, 31 to 33 (Figure 29). In this case, I also use the existing
enough space for further individual characterization of the surface study models as a guide.
(Figure 8). The comparison between the machined surfaces of the Figures 6 and 7 show the anterior teeth from the front, while
teeth from 13 to 11 and the unworked surfaces of the teeth 23 to 21 Figures 30 and 31 show them from the incisal edge. Next, we turn
clearly show the effect of individualization (Figure 9) our attention to the posterior teeth, as these need to be restored to full
Fig 1: Standard assembly in occlusion Fig 2: Standard assembly in later-otrusion
22 Dental Practice i July-August 2023 i Vol 19 No 4