
Page 23 - DP.qxd
P. 23
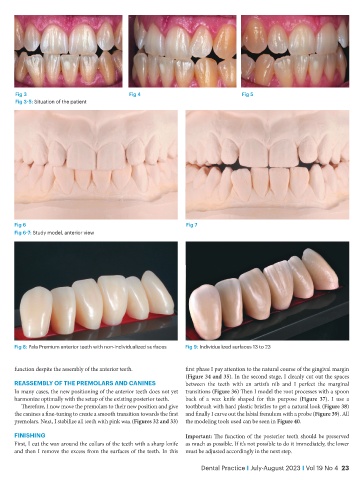
Fig 3                               Fig 4                                Fig 5
            Fig 3-5: Situation of the patient


           Fig 6                                                   Fig 7
           Fig 6-7: Study model, anterior view


           Fig 8: Pala Premium anterior teeth with non-individualized surfaces  Fig 9: Individualized surfaces 13 to 23


           function despite the assembly of the anterior teeth.   first phase I pay attention to the natural course of the gingival margin
                                                                  (Figure 34 and 35). In the second stage, I cleanly cut out the spaces
           Reassembly of the pRemolaRs and canines                between the teeth with an artist’s nib and I perfect the marginal
           In many cases, the new positioning of the anterior teeth does not yet   transitions (Figure 36) Then I model the root processes with a spoon
           harmonize optimally with the setup of the existing posterior teeth.  back of a wax knife shaped for this purpose  (Figure 37). I use a
              Therefore, I now move the premolars to their new position and give   toothbrush with hard plastic bristles to get a natural look (Figure 38)
           the canines a fine-tuning to create a smooth transition towards the first   and finally I carve out the labial frenulum with a probe (Figure 39). All
           premolars. Next, I stabilize all teeth with pink wax (Figures 32 and 33)   the modeling tools used can be seen in Figure 40.

           finishing                                              Important: The function of the posterior teeth should be preserved
           First, I cut the wax around the collars of the teeth with a sharp knife   as much as possible. If it’s not possible to do it immediately, the lower
           and then I remove the excess from the surfaces of the teeth. In this     must be adjusted accordingly in the next step.

                                                                        Dental Practice i July-August 2023 i Vol 19 No 4  23